Configuring Order Fulfillment in the AndonCloud System
This section of the manual describes both basic settings and advanced options that allow you to customize the order fulfillment process to your company’s specific needs.
Settings for validating the order number and product number fields.
- In the admin panel, select the “Company” tab, then the “Companies” option.
- Next, click “Edit Company" in the upper-right corner.

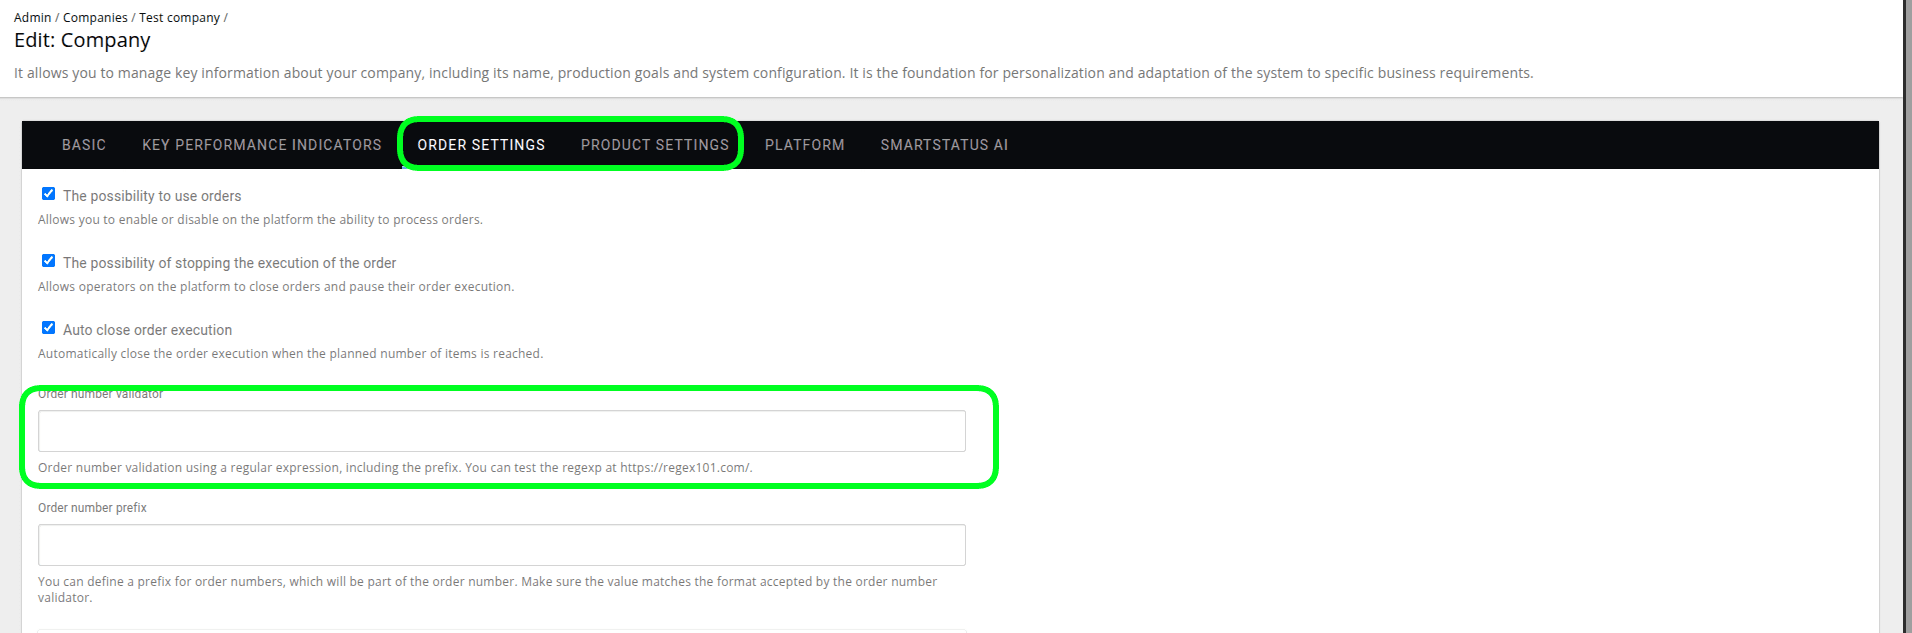
3. In the “Order Settings” and “Product Settings” tabs, in the following fields:
- “Order Number Validator”
- “Product Number Validator”
- please enter the appropriate values.
Order number and product number prefixes.
- In the admin panel, select the “Company” tab, then the “Companies” option.
- Next, click “Edit Company" in the upper-right corner.
- In the "Order Settings" and "Product Settings" tabs, in the fields:
- "Order Number Prefix"
- "Product Number Prefix"
- enter the appropriate values.

4. Please confirm by clicking “Update: Company.”
The “Prefix” numbers will be automatically filled in by the system on the order creation form in the operator panel.
ATTENTION!!!
If the prefix changes—for example, at the start of a new year—and you wish to process orders from the previous year or add products introduced in the previous year to a new order, you must remove the current prefix from the form when adding the order on the operator’s platform. The system will then automatically search the database for the relevant products and fill in their names.
Customize the messages and notes displayed in the system.
- In the admin panel, select the “Company” tab, then the “Companies” option.
- Next, “Edit Company" in the upper-right corner.
- In the "Order Settings" tab, a panel titled "Order Form notes" will appear at the bottom of the form.
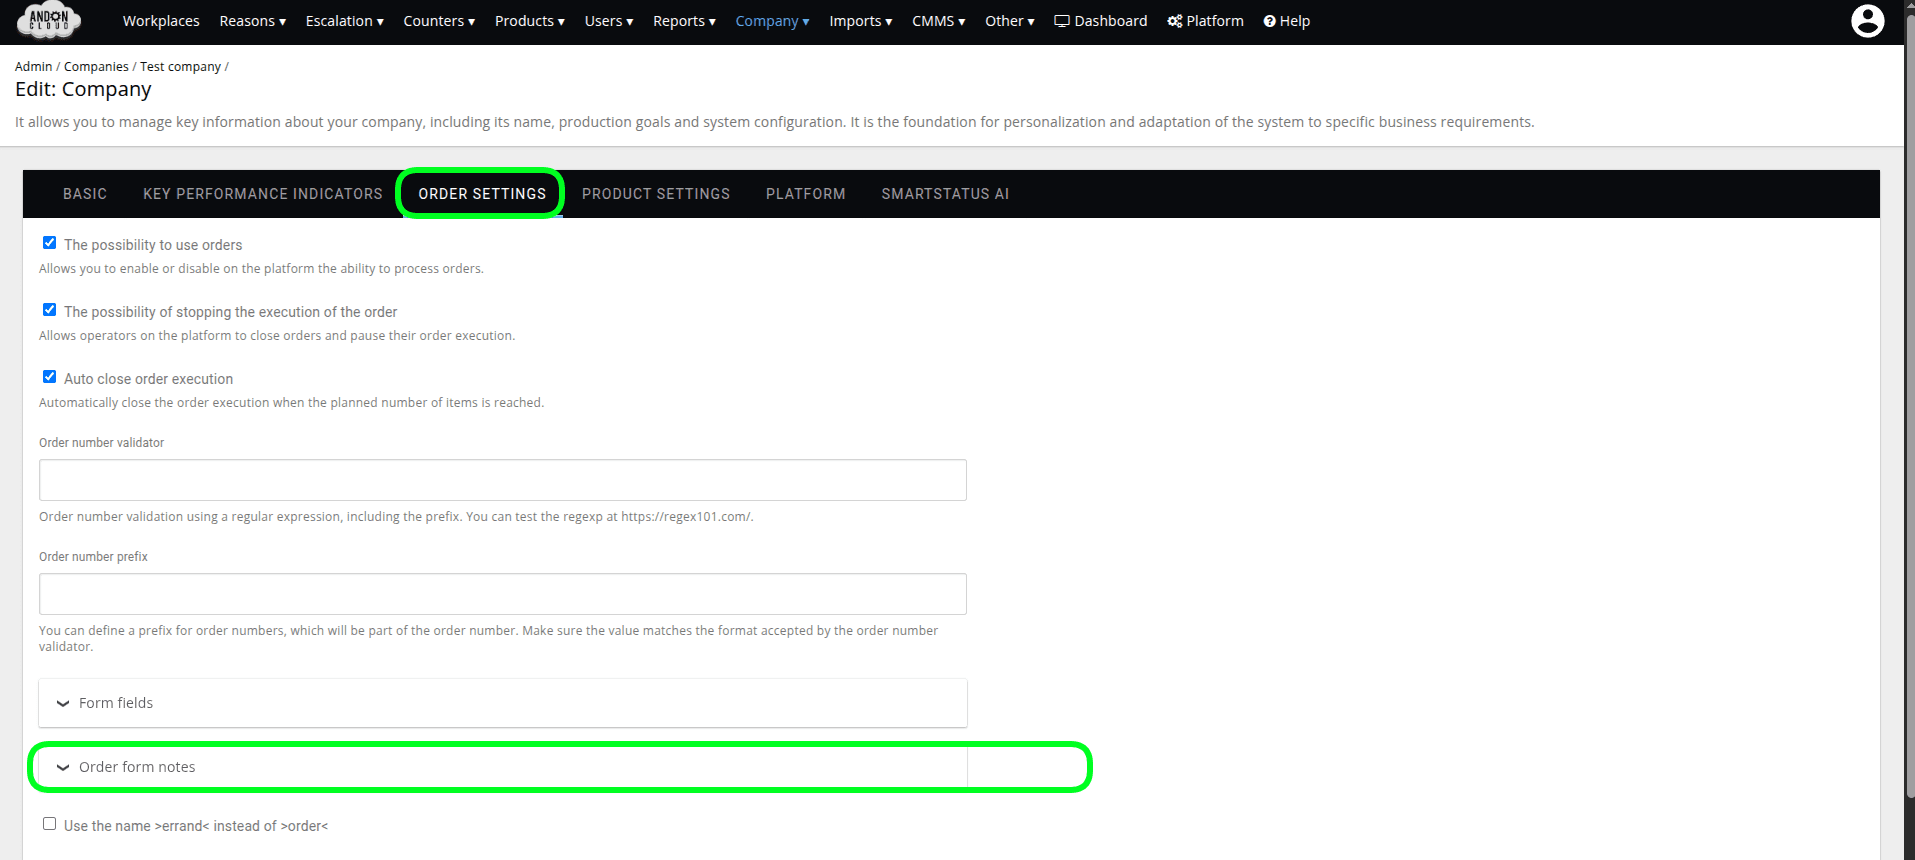
In the appropriate fields, you can enter the title and content of the note for the “Order Section,” “Product Section,” “Quantity Section,” and, if applicable, the “No Order Execution Plans” section.
4. Please confirm the changes to the forms by clicking “Update: Company.”
Hiding unnecessary fields in the order form.
If you do not use all the fields available in the form—for example, if you do not need the "Product Name" field—you can hide them in the organization settings and enable them if necessary.
In the admin panel, select the "Company" tab, then the "Companies" option.
- Then click “Edit Company” in the upper-right corner.
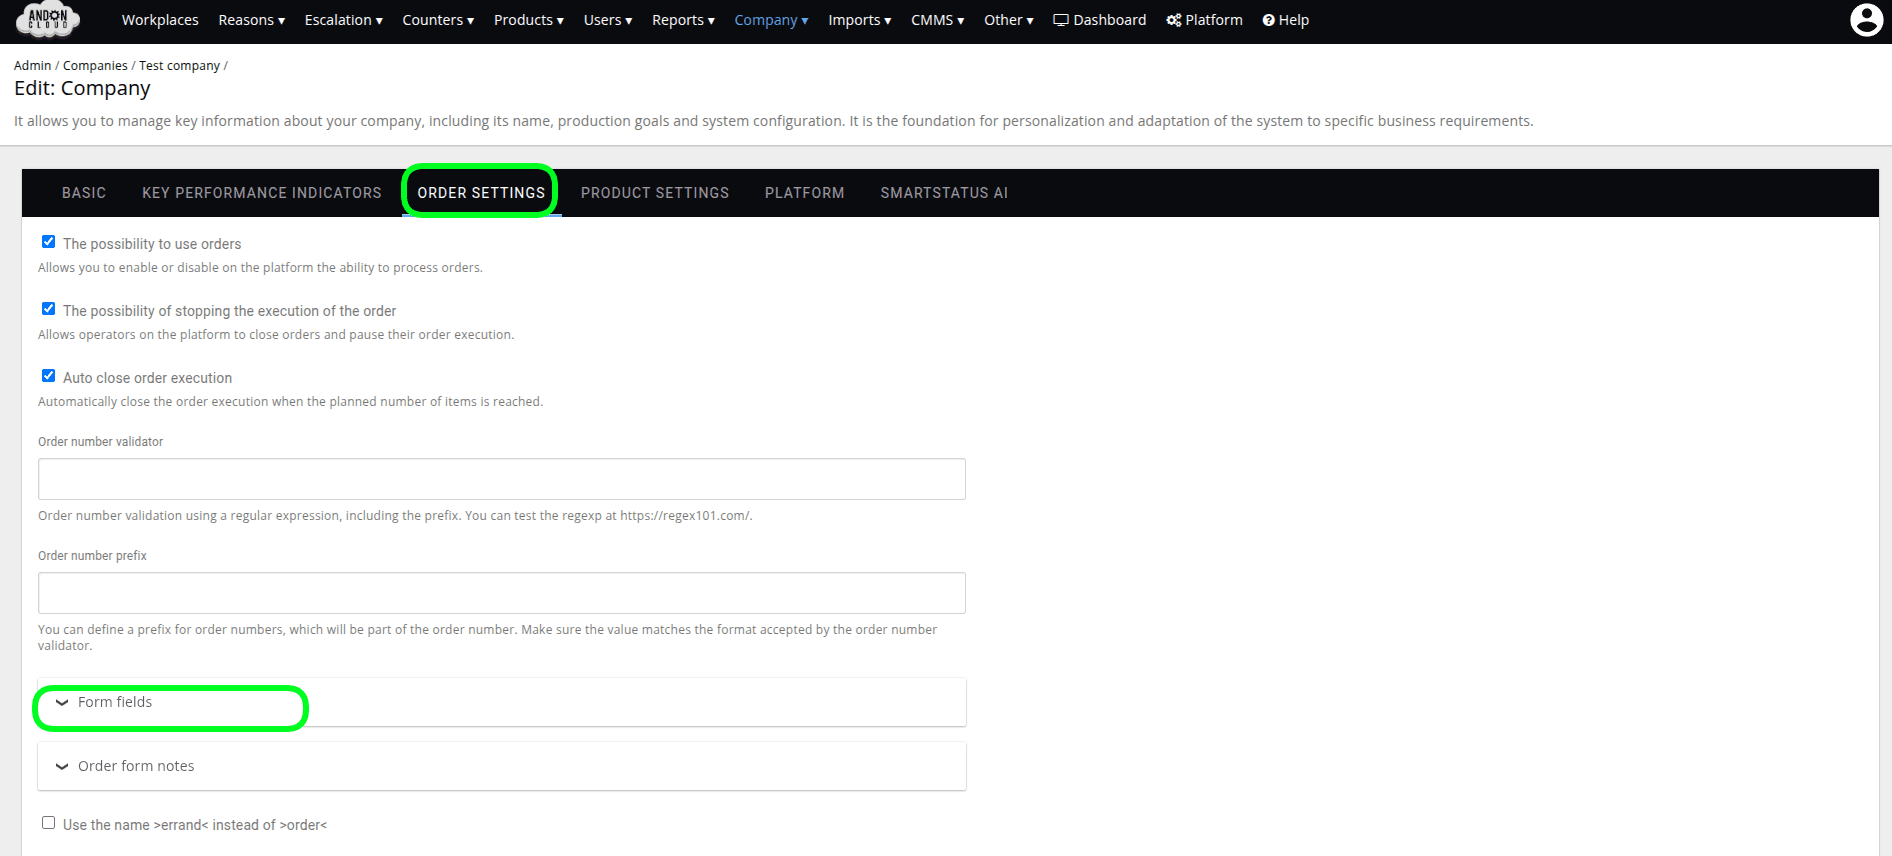
- In the “Order Settings” tab, you’ll find a dropdown list titled “Form Fields.” To disable a specific field, click the “x” next to that entry. To re-enable the field, select it from the dropdown list.
- Please confirm the changes to the forms by clicking “Update: Company.”
Automatically close order fulfillment.
- In the admin panel, select the “Company” tab, then the “Companies” option.
- Next, “Edit Company" in the upper-right corner.
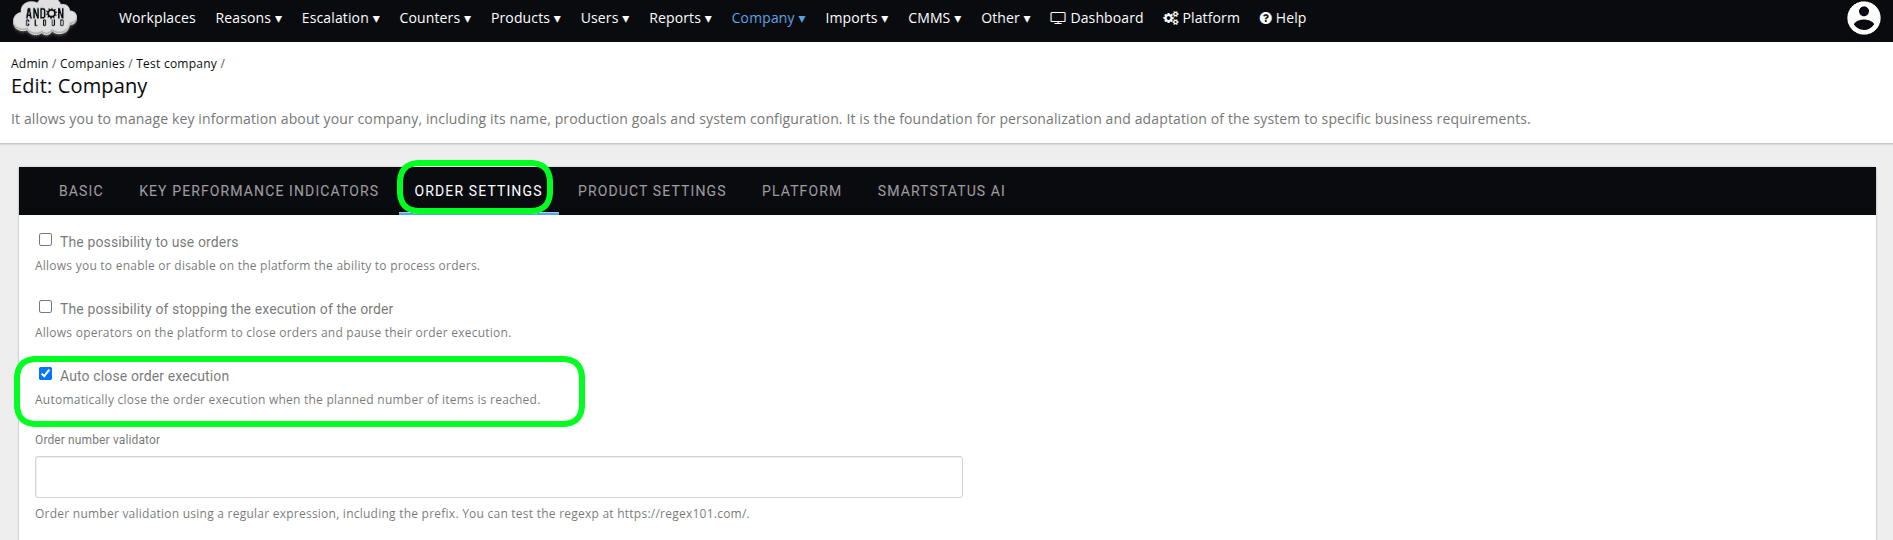
- In the "Order Settings" tab, check the "Automatically close order fulfillment" checkbox.
- Please confirm the changes to the forms by clicking “Update: Company.”
In the Operator Panel, an order for which the number of units produced reaches the specified production target will be closed, and the following message will appear on the screen:
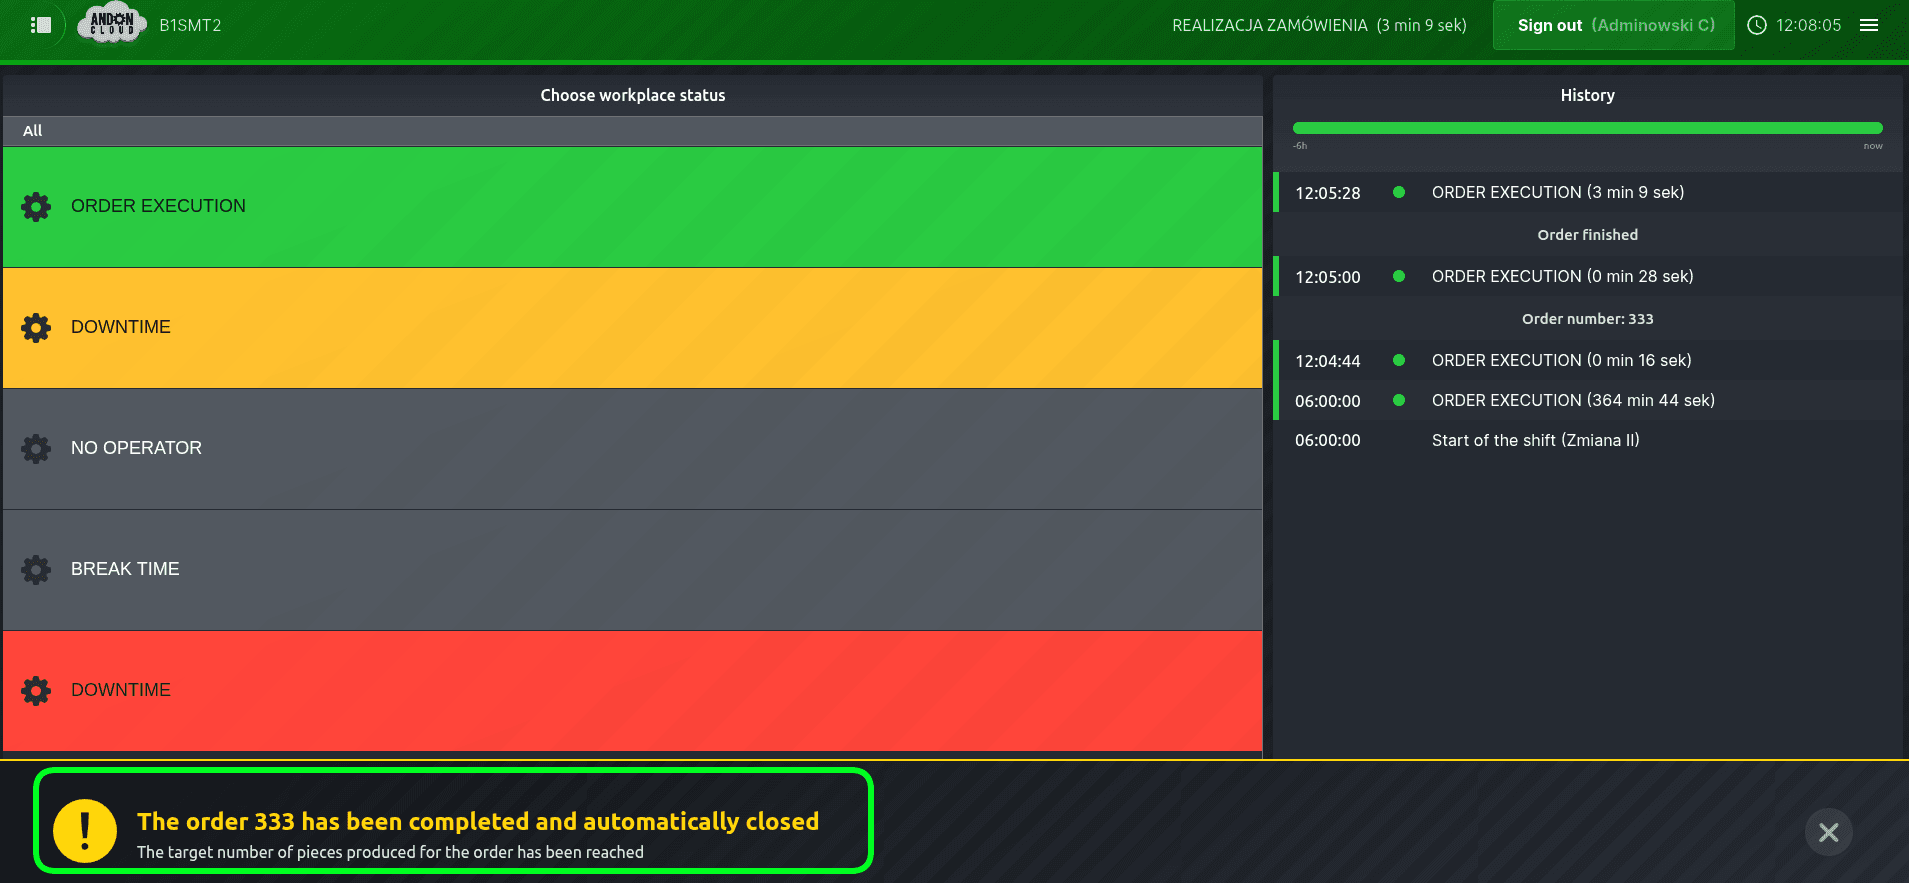
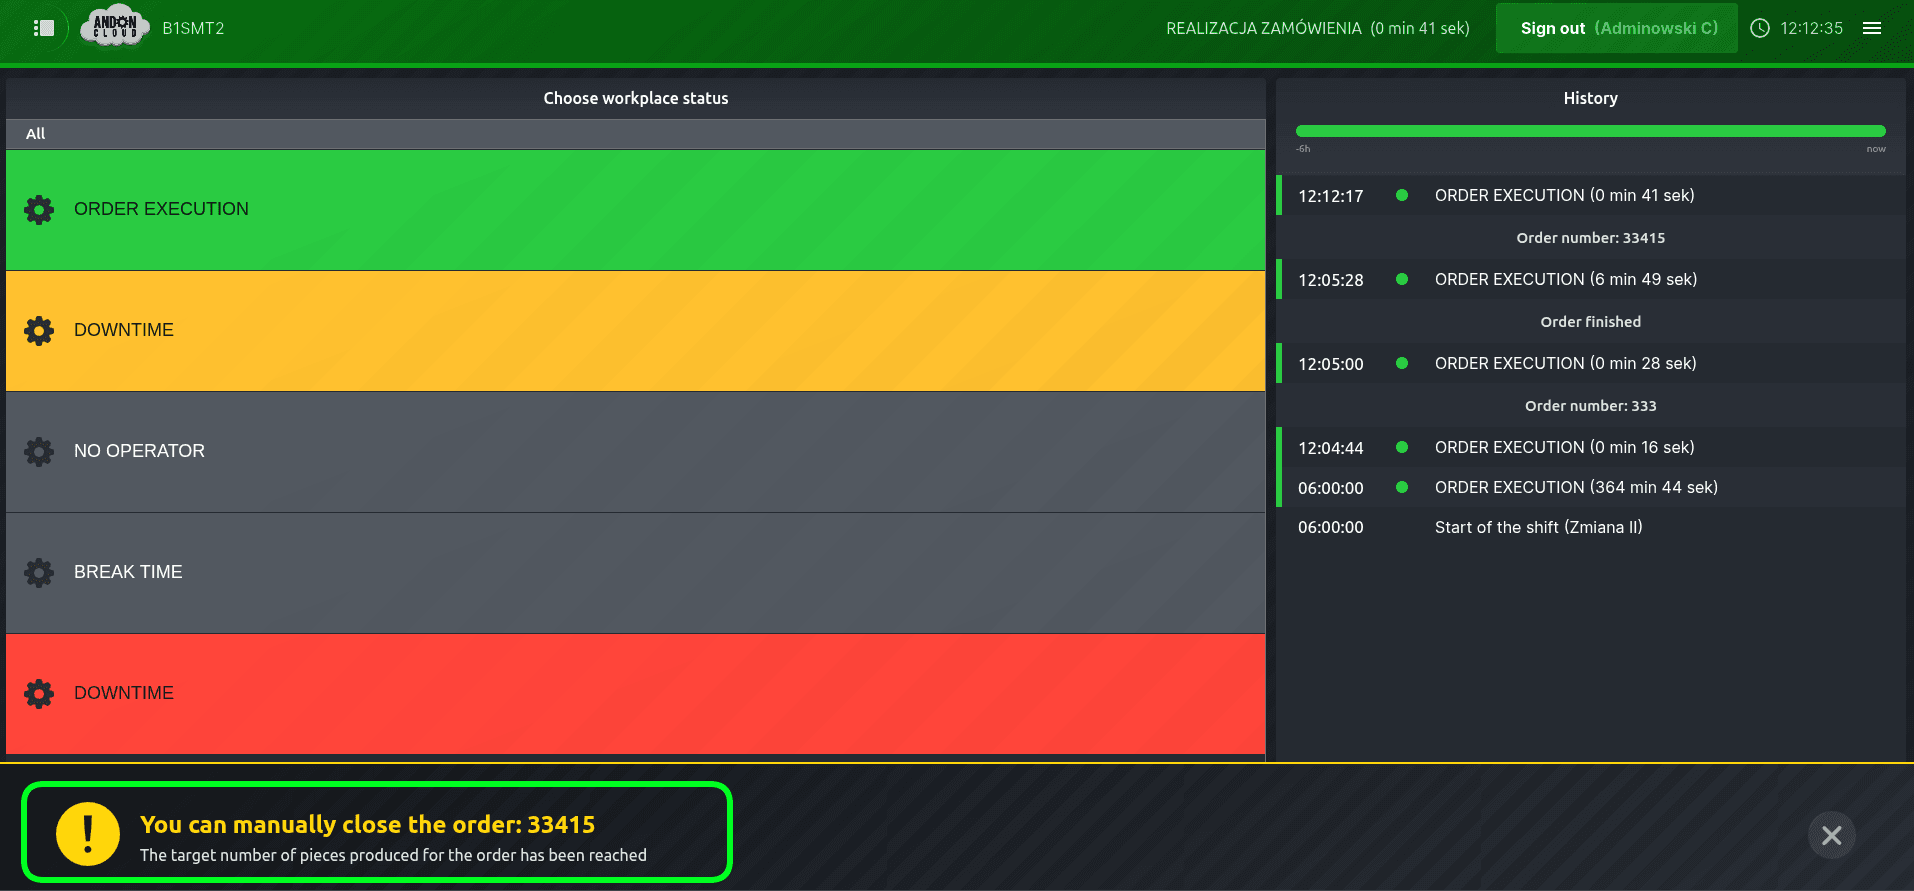
Automatic order closure is possible if you use good-piece counters and a production target is specified in the order. If the number of good pieces entered into the system equals the specified production target, the system will automatically close the task. If you do not want the system to close the order upon reaching the production target—for example, because you want to produce more units—please do not check the “Automatically close order” checkbox. Once the production target is reached, the operator will be notified by the system with an appropriate message:
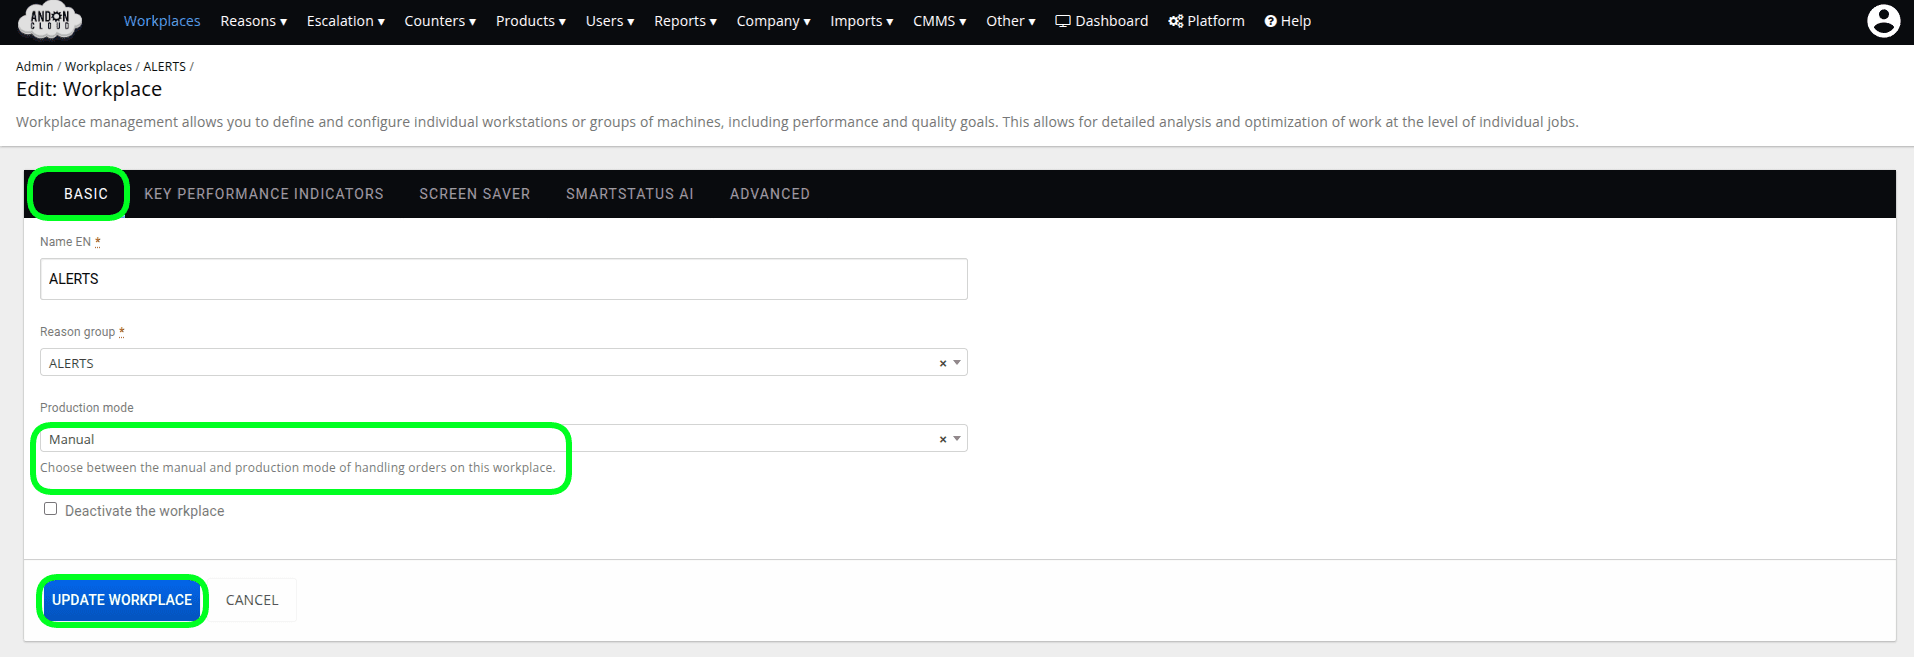
Changing the workstation operation mode.
- In the admin panel, select the "Workstations" tab.
- Select the appropriate workstation.
- Then click "Edit," the option available in the menu indicated by three dots.
- In the "Basic" tab, in the "Production Mode" field, set "Manual" or "Scheduled" and confirm your selection by clicking "Update Workstation."
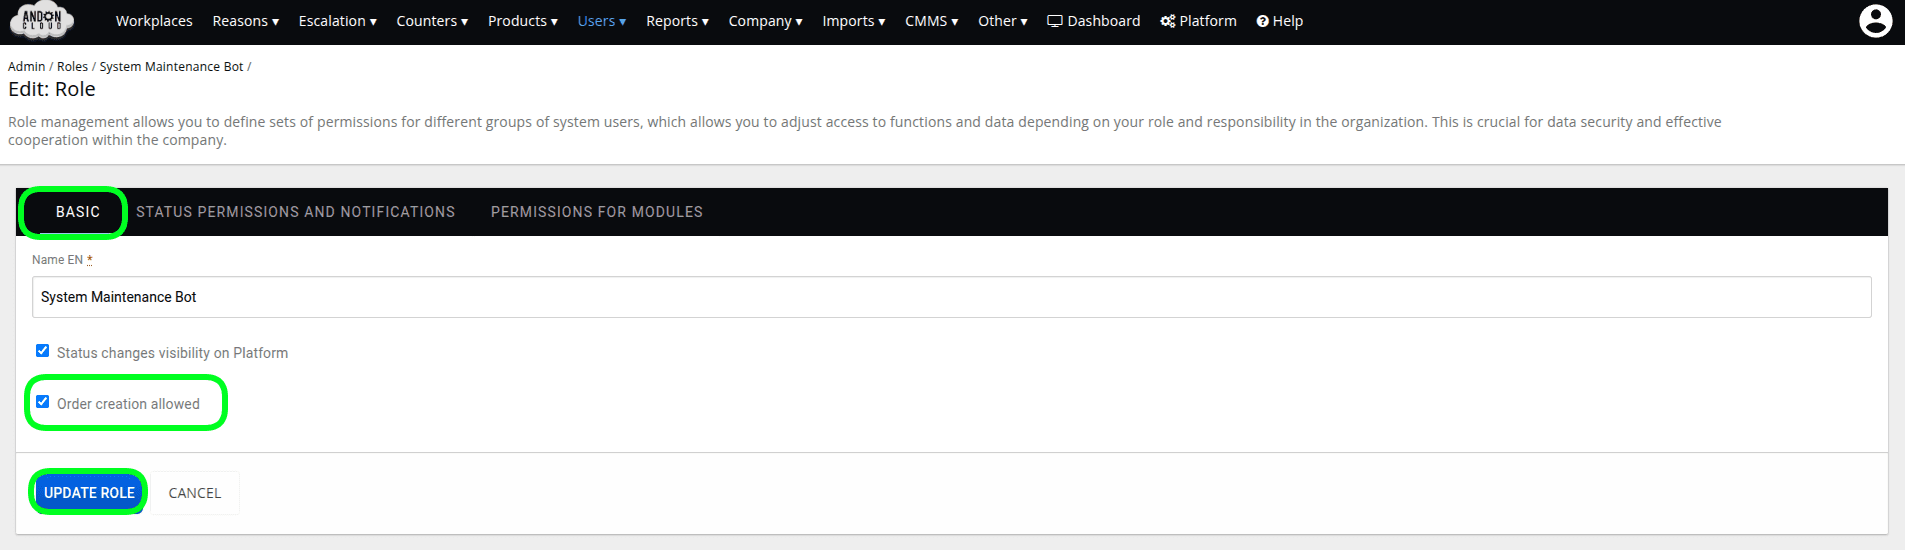
Ability to create orders on the Platform
This permission is assigned to an employee role. It can be granted in the administrator panel.
- In the administrator panel, go to the "Users" tab and select "Roles".
- Edit the appropriate role (for the user logging in to the position).
- In the "Basic" tab, check "Order creation allowes."
- Click "Update: Role."
ATTENTION!!!
When editing roles, please note that you must edit the role of the user logging in to the workstation. The role of the operator(s) clocking in at the workstation is not taken into account. (The user logs in to the workstation with the permissions you have set, while the employees performing production work clock in/out at the workstation.)
To edit the selected role, click the menu marked with three dots located to the right of the row.
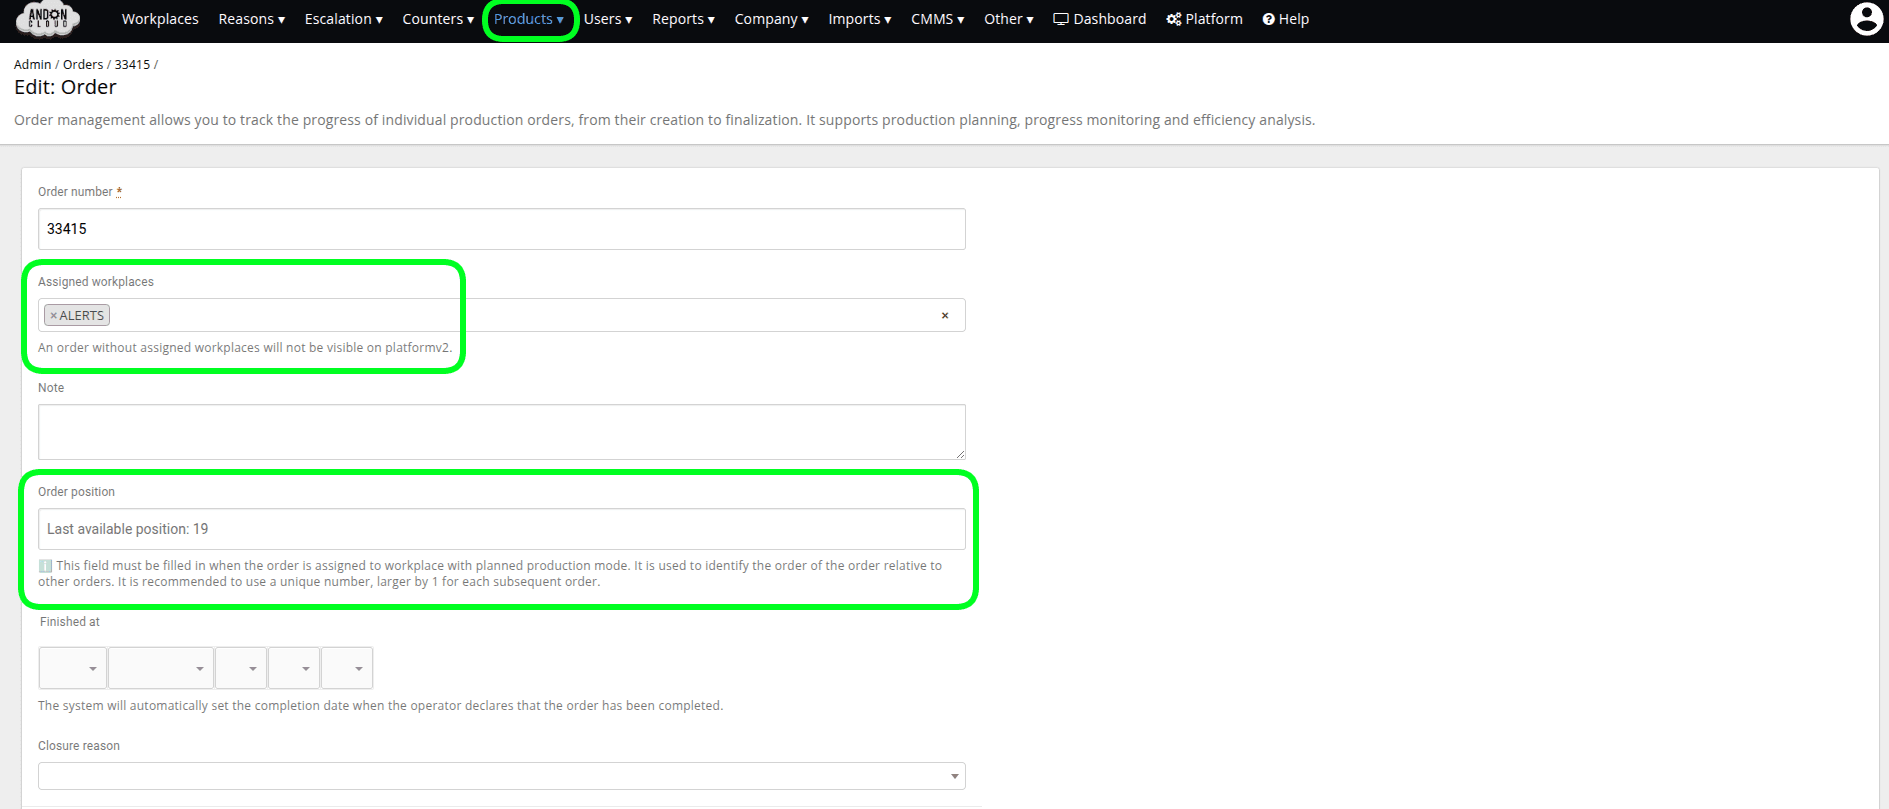
Adding new orders to the “Scheduled Orders” list.
To add orders to the “Scheduled Orders” list, you must import them or enter them manually in the admin panel.
Note!
Please remember that you must assign a workstation and a processing order to each order; otherwise, it will not appear on the list of scheduled orders. You can also assign multiple workstations to a single order; in that case, the order will appear on the list of scheduled orders for each of them, and the “good items” added will be tallied on the progress bar.
Production Standards in Order Fulfillment
To assign a production standard, the order must be linked to a product by its number. Production standards can be entered manually or using the production standard importer.
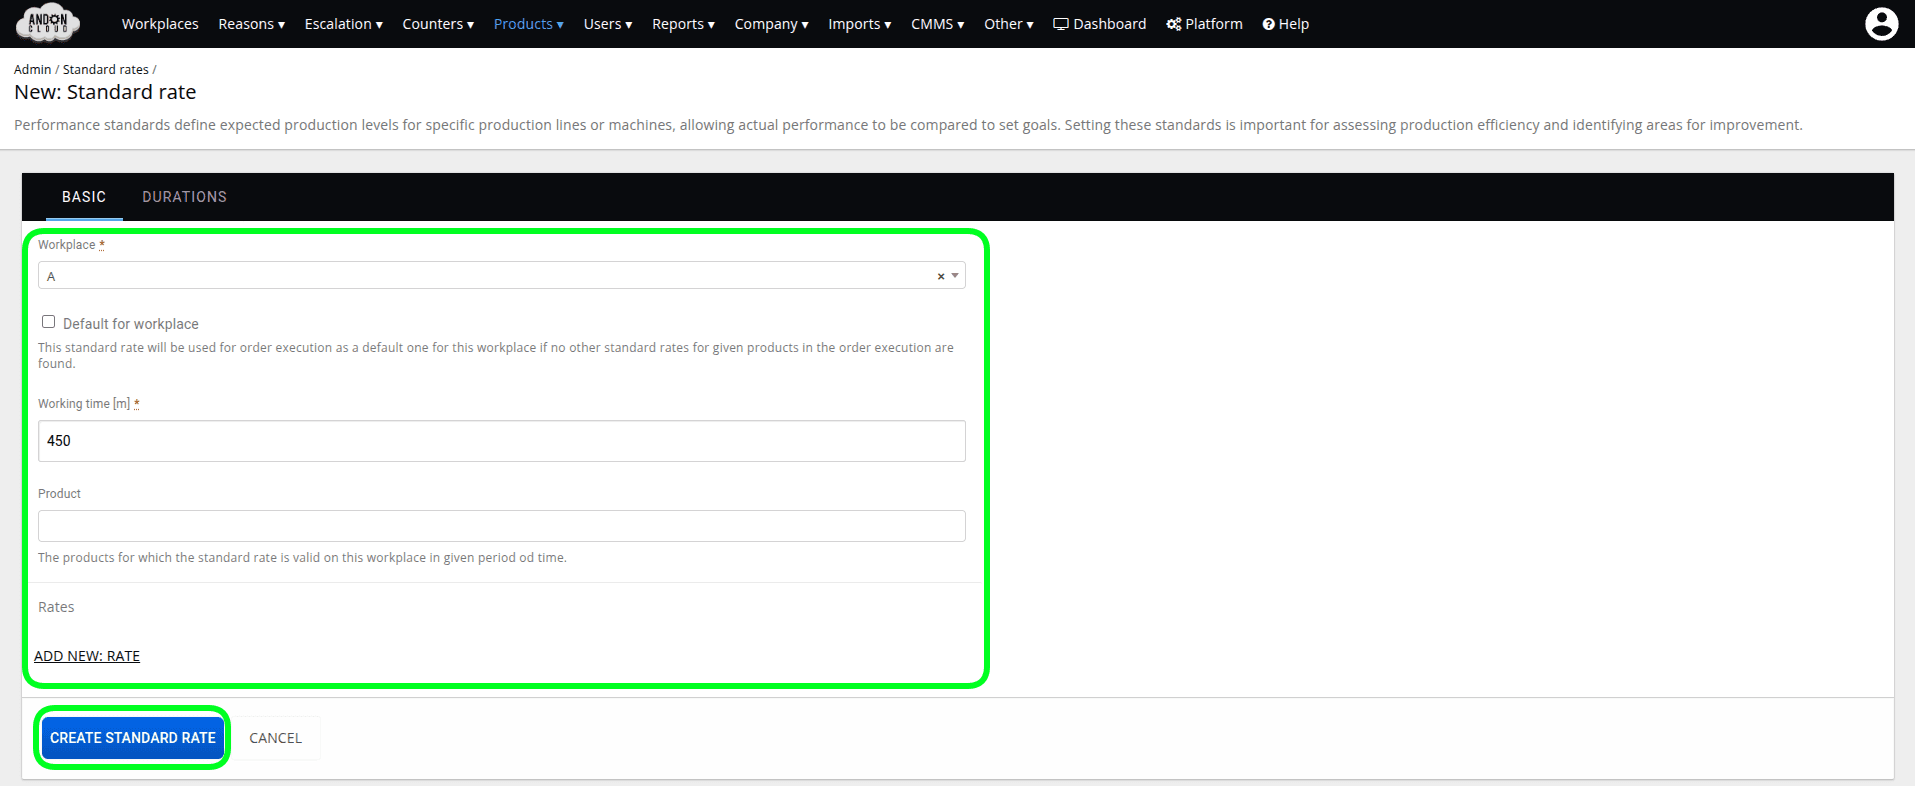
To enter a production standard:
- In the "Products" tab, select the option: "Standard rates"
- Then, in the upper right corner, click the option: "New: Standard Rate"
- A form will appear; fill in the required fields
- Confirm the changes by clicking: "Create: Standard Rate"
Adding existing orders to the "Scheduled Orders" list
- If you add an order to the form that already exists in the list of scheduled or started orders, or a historical order (i.e., one that has already been fulfilled and closed), the system will automatically populate the product details and the quantity of scheduled items.
- If an order is added to the form that is being processed at a different workstation, the system will display a corresponding message.
- If an existing order number, created in the admin panel and previously unassigned to a workstation, is entered into the order creation form, the system will automatically populate the product and quantity details and, upon order initiation, assign a workstation to that order in the database.
- If a product already existing in the system is added to a new order, the system will automatically populate all its details.