Statuses in the AndonCloud system play a key role in production management. They provide information on the status of machines and production lines, support problem diagnosis, and automate processes. Statuses can:
- trigger notifications,
- support failure analysis,
- facilitate communication between teams,
- activate processes (e.g., creating work orders).
Proper configuration of widgets on the Dashboard allows you to view the current status of a workstation in real time.
Reasons groups
To create Reasons, you must first create a reasons groups. Groups allow you to classify and group statuses by production categories.
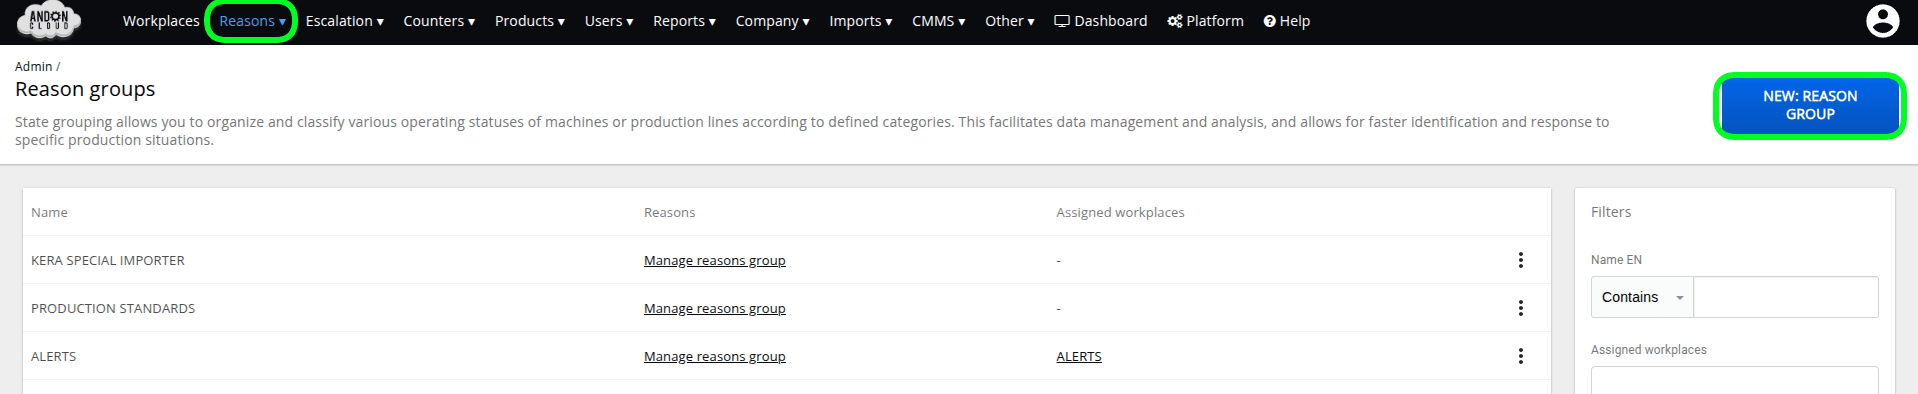
To create a Reasons groups:
- In the admin panel, select the "Reasons" tab, then the "Reason groups".option.
- Click the "New: Reason Group" button in the upper-right corner.
- In the "Basic" tab of the form, fill in the "Name" field.
- Then confirm by clicking the "Create: Reason Group" button.
We will return to the "Advanced" tab later.
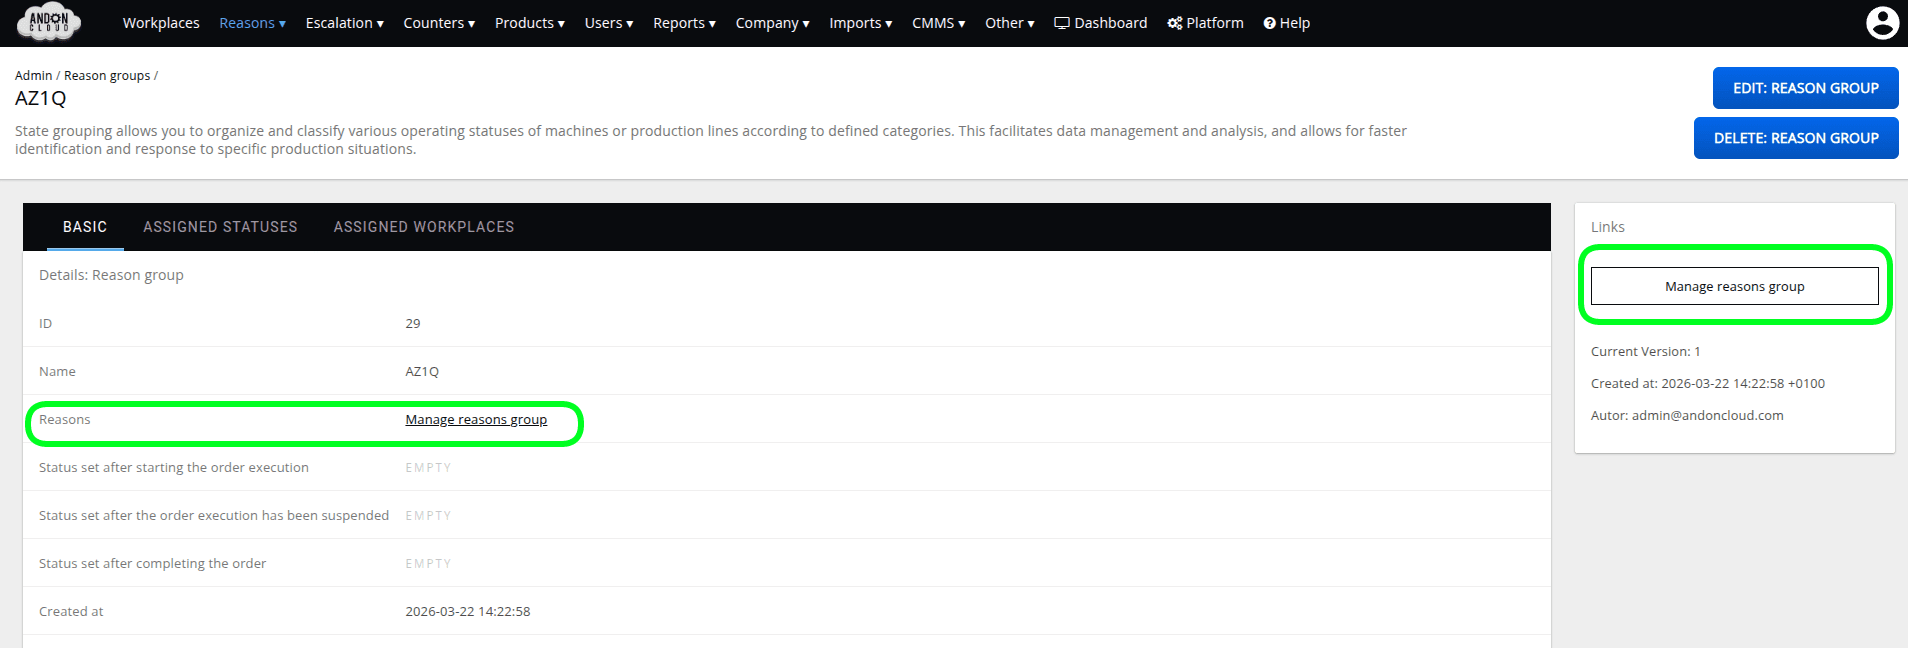
The system has displayed the newly created “Reason group” You can now create individual statuses.
Reasons
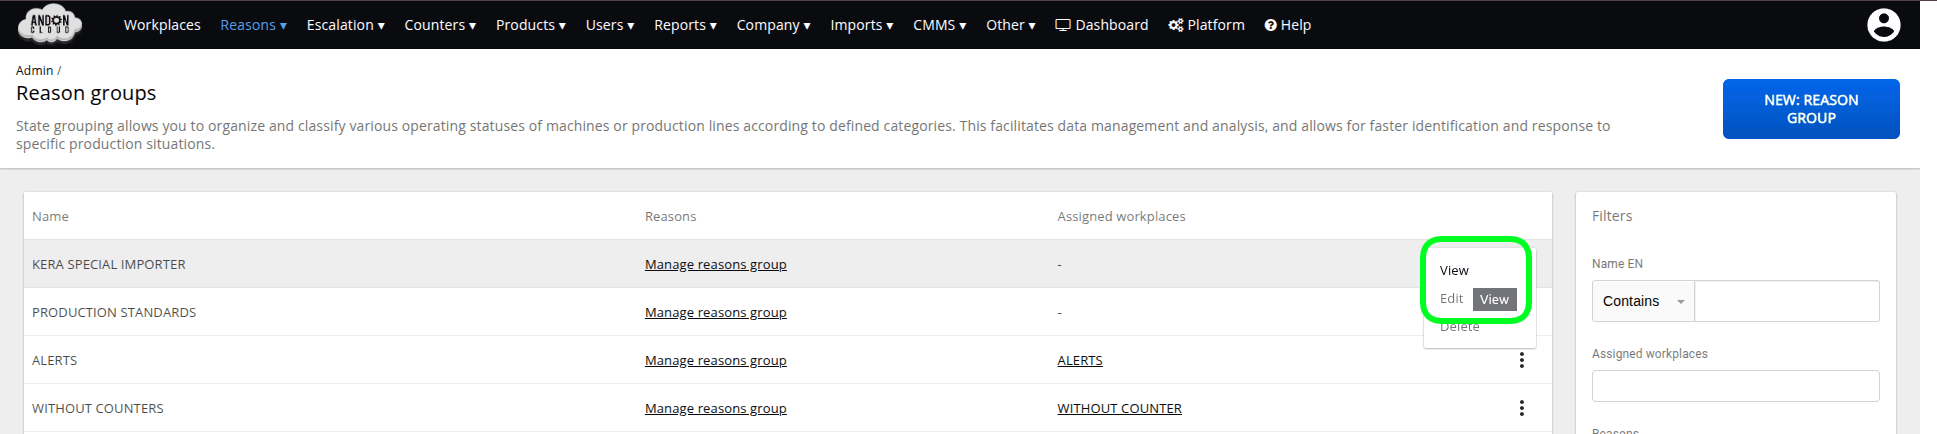
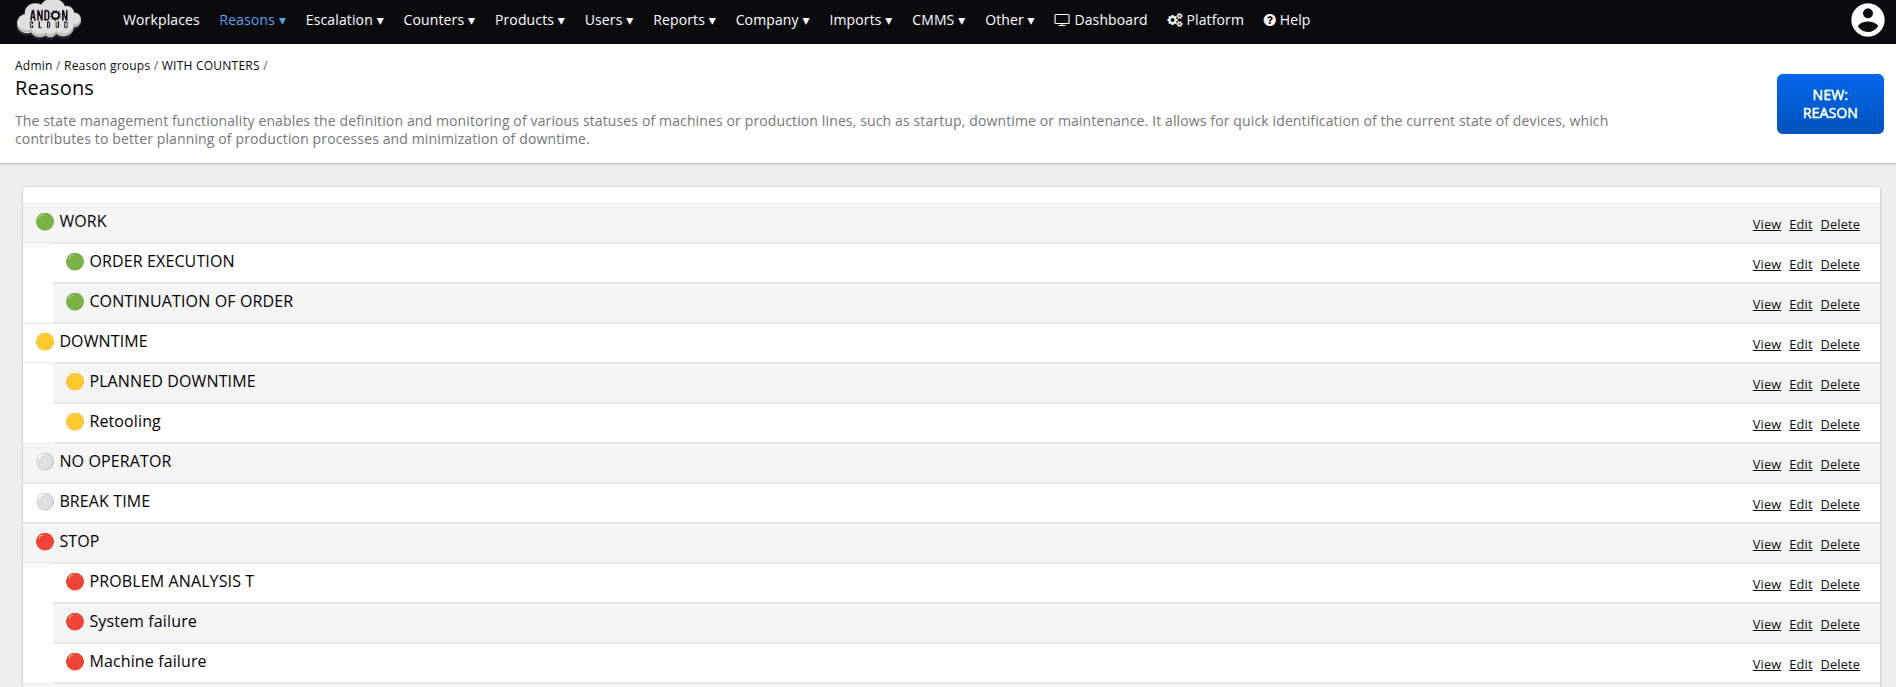
To create statuses for a newly created Reason group, do the following:
- In the admin panel, select the "Reasons" tab, then the "Reason groups".option.
- From the list, select the group you created, and click View
To create a Reason, click the “New Reason" option, or if the Status resource does not yet exist, click the “Create it” option

The system will display a form. In addition to entering a name, you must select the specific functions you want your reason to perform.
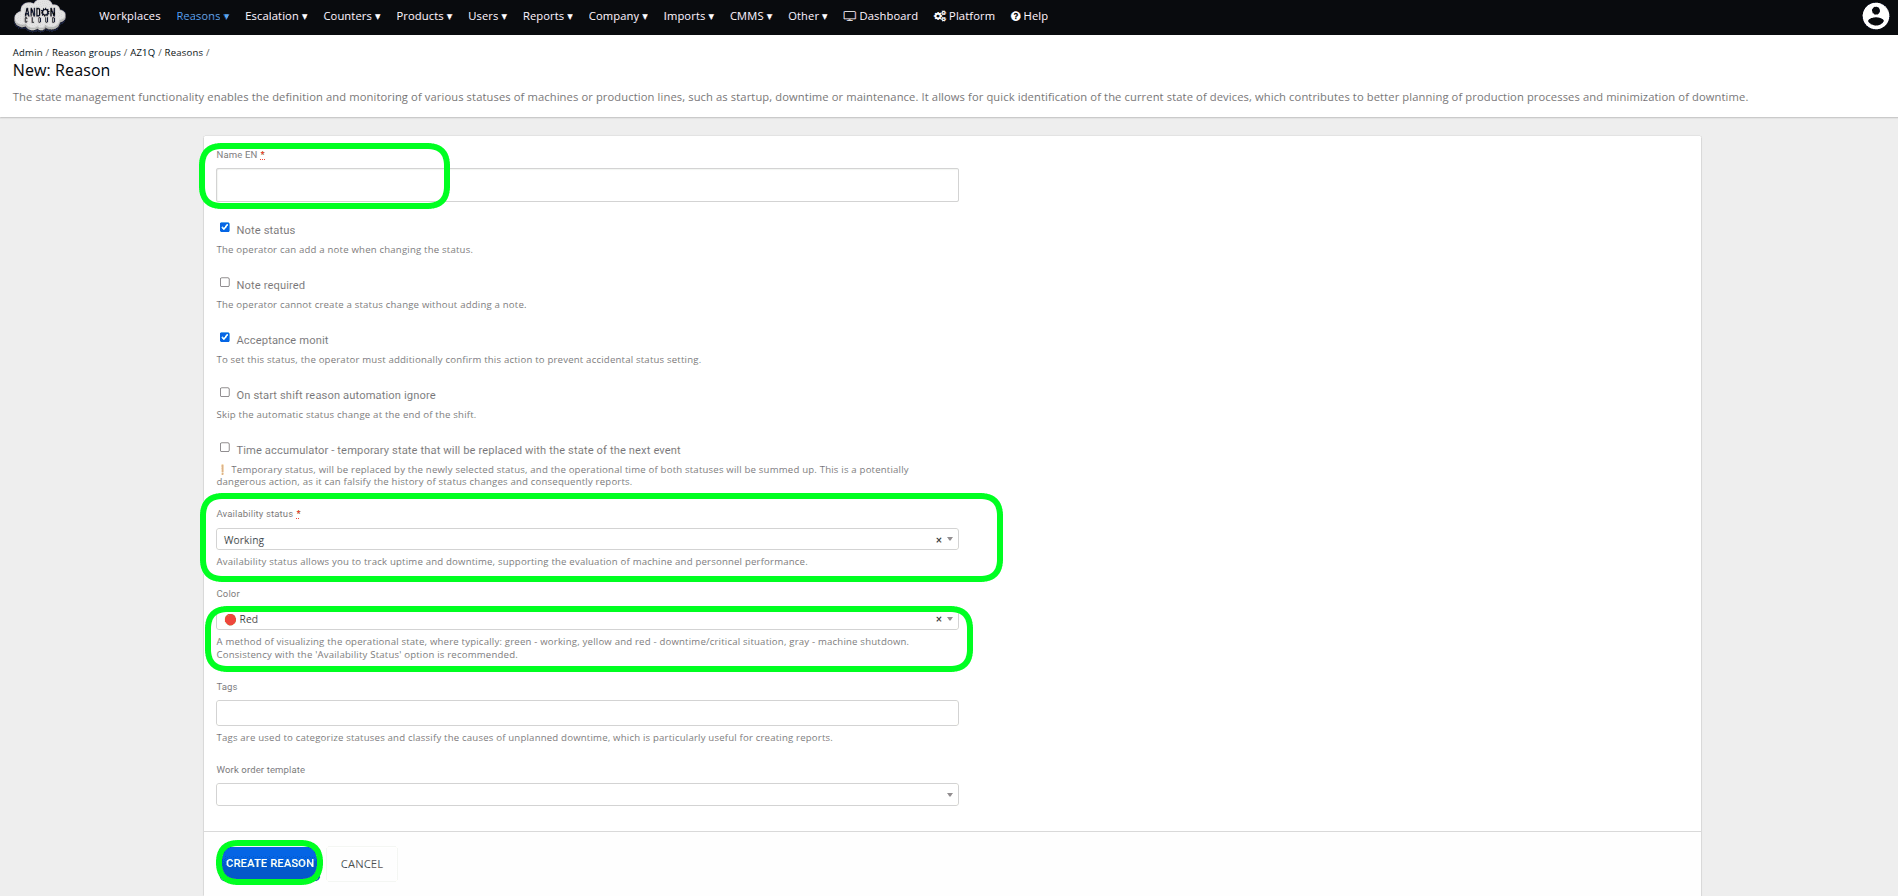
We recommend creating the following basic statuses at the start of the configuration:
- Running – the machine is running and in active use
- Downtime – the machine has been shut down according to schedule
- Changeover – the machine is in the process of being reconfigured, e.g., for a new type of production.
- Malfunction – the machine continues to operate, but the operator has observed an anomaly requiring verification by the Maintenance Department.
- Breakdown – the machine has stopped operating due to an unexpected technical problem.
- Operator Break
You can expand this listof reasons extensively by creating “workstation reasons trees.”
Creating a Reason tree
The reasons tree helps organize statuses and more accurately reflect the situation on the job.
To create a reason tree, first create a main reason (as in the example above, e.g., Failure) and then create the reasons you want to include in the main reason tree. To move reasons within the tree or change their order, click on a reason and drag it relative to the others to the position where it should be displayed in the reason tree. ("Drag and drop") In this way, you can create additional branches of the tree; however, we recommend a maximum of three levels of hierarchy to ensure that individual reasons are displayed correctly on the operator's platform.
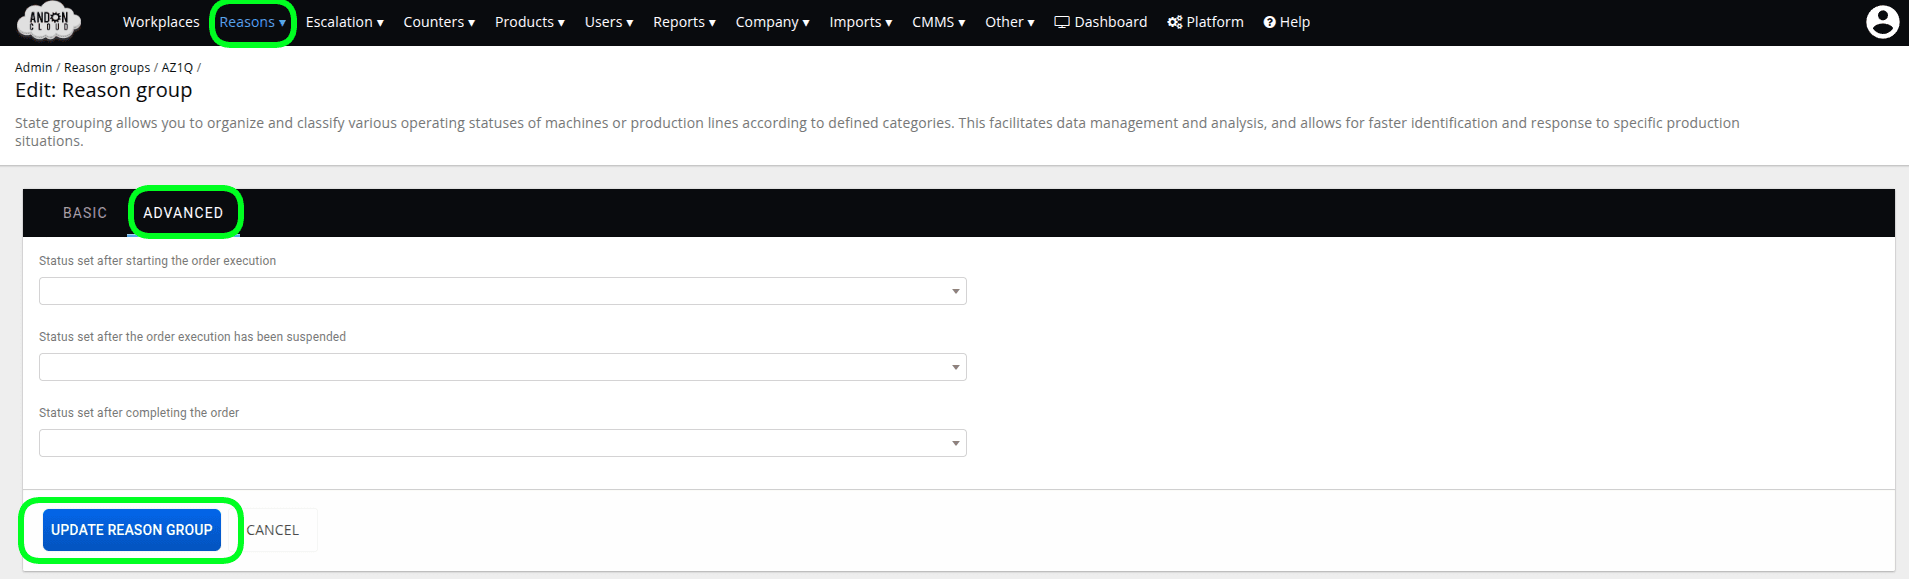
At this point, we will return to the advanced options of the "Reason Group." To access the advanced options, select the "Reasons" tab in the admin panel, then choose "Reason Groups."
In the list of groups, please locate the group you created and click the "Edit" option, which will appear when you hover your cursor over the menu marked with three dots.
In the ADVANCED tab of the form, you can set reasons in the individual fields by selecting them from the drop-down list, and then confirm your settings by clicking the "UPDATE: REASON GROUP" option.
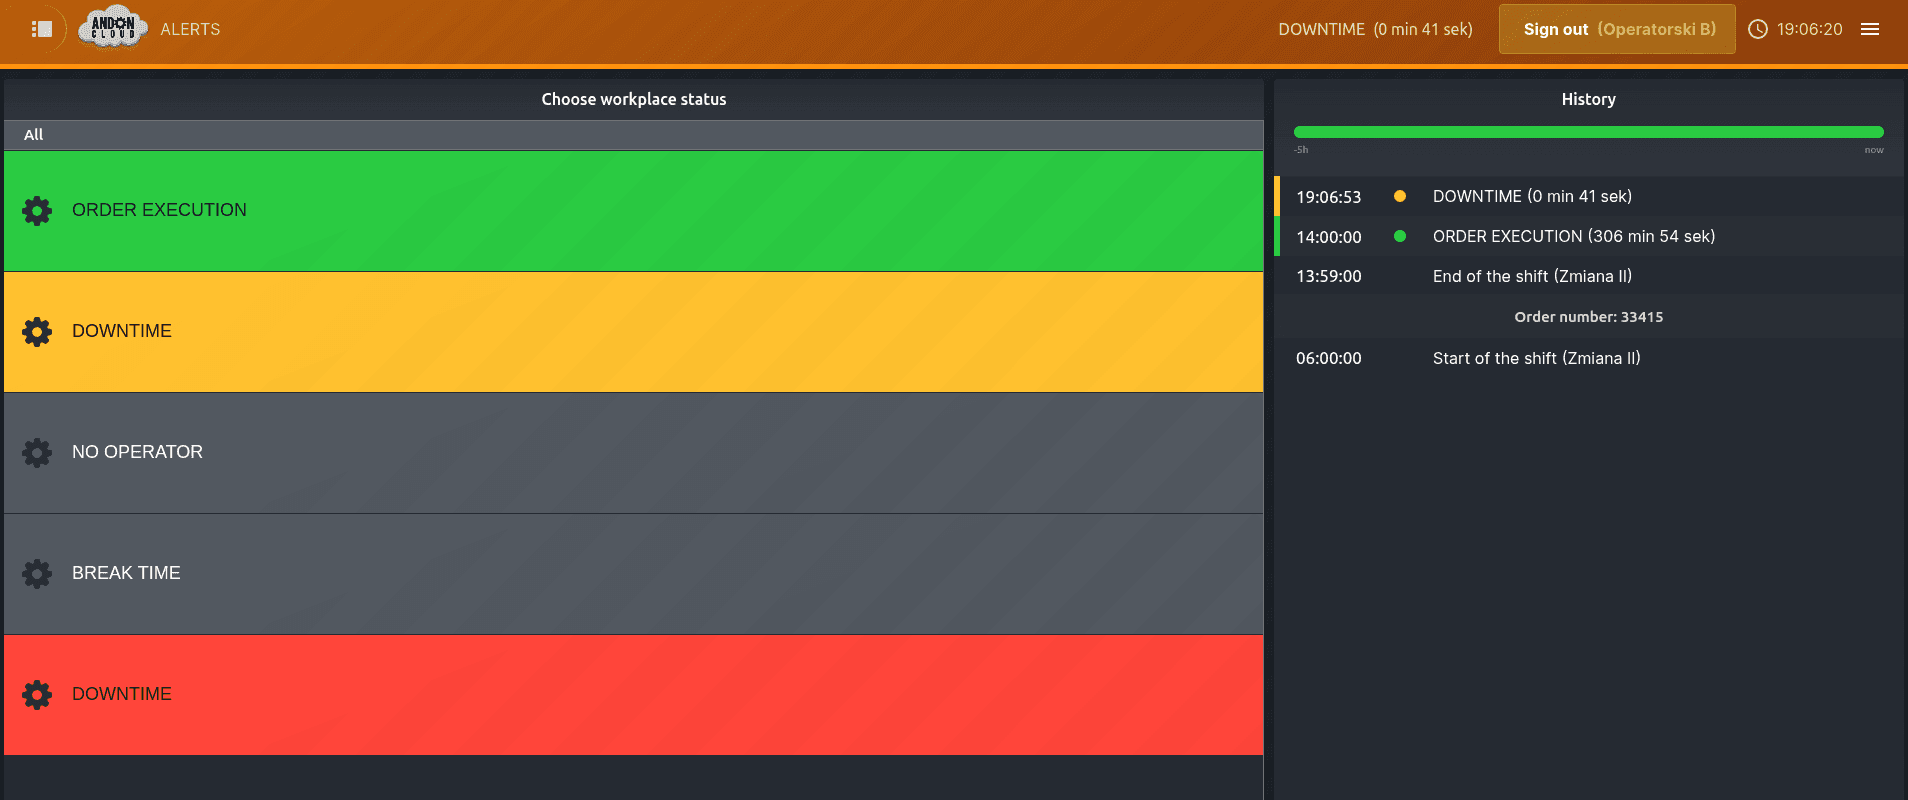
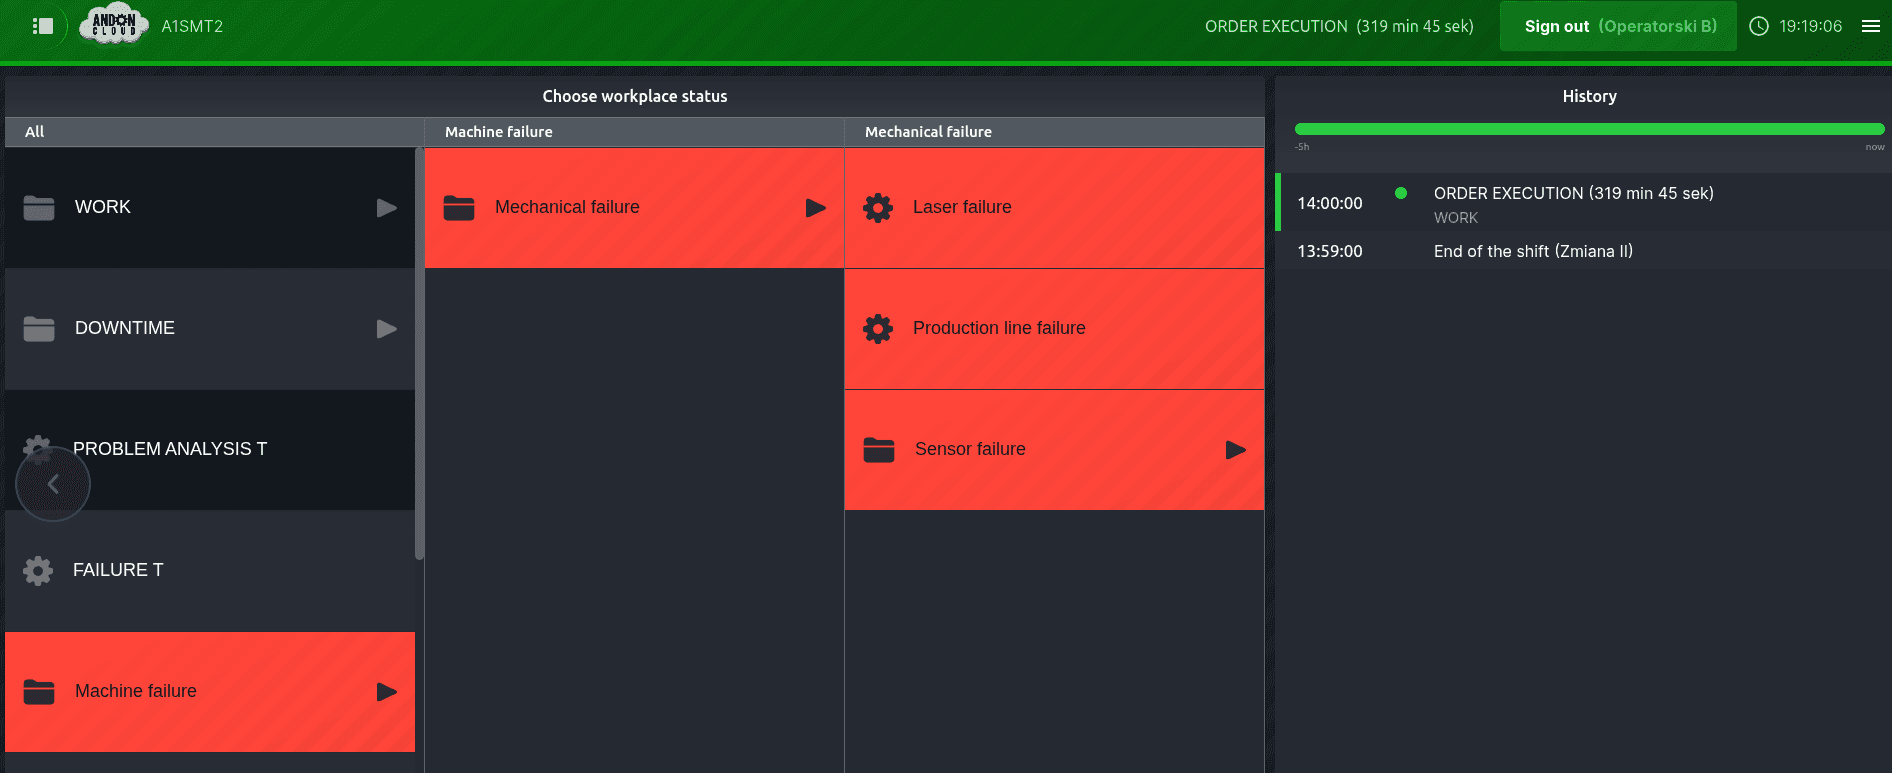
The "reason groups" prepared and assigned to a given workstation are displayed in the Operator Panel. The first image shows the list of reasons at the workstation, without an expanded reason tree,
and second, a list of statuses with an extensive, three-level status tree
Temporary reasons are used to indicate temporary conditions that will be replaced by the appropriate reason once the relevant actions are completed. The duration of both reasons will be combined and recorded as a single entry in the history.
Example: The operator noticed a problem, but the line is operational — they set the "Fault" reason (temporary). After resolving the issue, they set the "Operational" reason. No additional entry is created in the report, but the duration of the fault is included.
This is very useful when analyzing failures to avoid distorting actual report data. For better visibility, we have implemented a pulsating visual effect. When a temporary reason is set for a workstation, the reason will flash both in the top bar and in the reason change history at the moment the temporary reason is set.
Reason Changes
WARNING!!! In the AndonCloud system, it is possible to edit, create, and delete reason change records; however, manual modification of a reason may lead to inconsistencies in reports and data analyses, and may result in previously generated reports becoming outdated. Introducing modifications to reason records requires maintaining time continuity of reasons, so that they do not overlap or create gaps.
If you need to make changes to reason records, please contact support@andoncloud.com
The functionality related to reason changes is located in the "Reasons" tab, under the "Reason Changes" option.
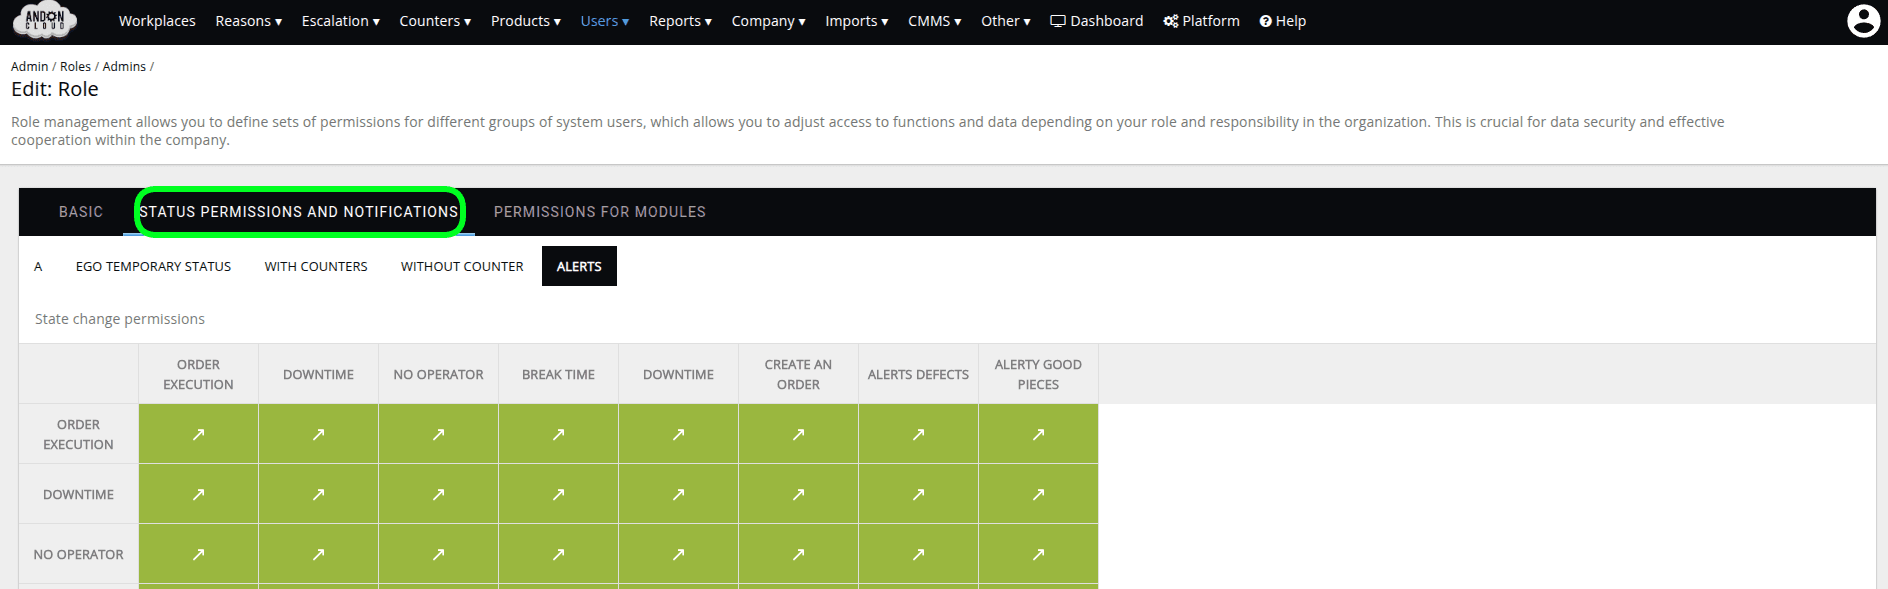
Permission and Notification Management
The system allows permissions for reasons to be assigned according to user roles. This makes it possible to restrict access — for example, to temporary reasons — for less experienced operators.
To configure permissions:
To configure permissions:
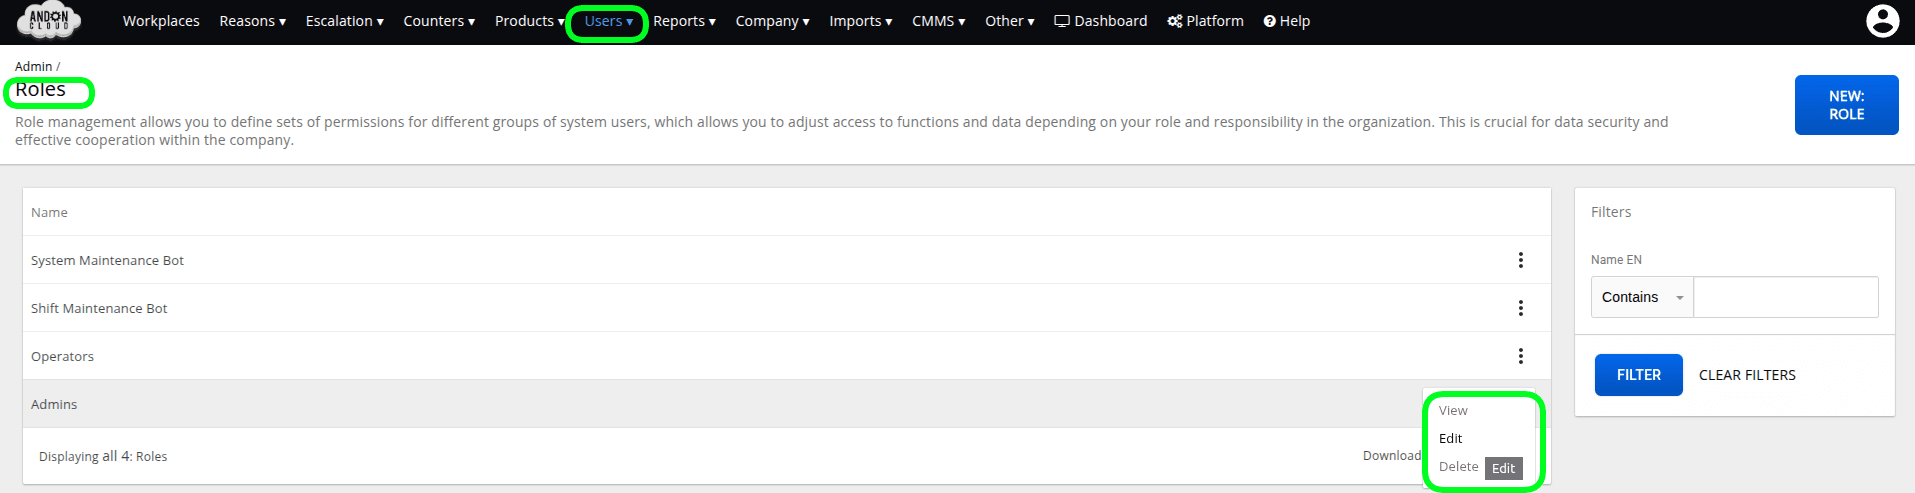
- Go to the "Users" tab and select the "Roles" option.
- From the list, select the Role for which you want to change the settings.
- Click the "Edit" option in the menu located on the right side of the row.
5. From the list, select the group you created and click "View."